How to Install Mac OS X Yosemite on a USB Flash Drive
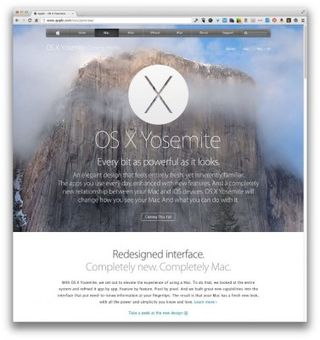
You might want to try out Yosemite but not modify your primary Mac. You can install Yosemite on an external drive (at least 8GB, but 16GB is better). For the best experience, you should install Yosemite on the fastest external drive you can, otherwise it might be very slow. Other than the thumb drive, all you need is a Yosemite compatible Mac (2007 iMac, 2008/9 MacBook, 2007 MacBook Pro, 2008 MacBook Air, 2009 Mac Mini, or 2008 Mac Pro or later models).
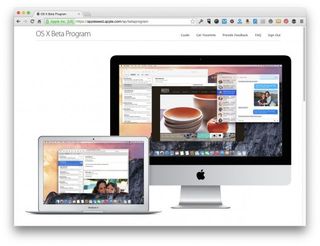
1. Download a copy of Yosemite from Apple. Prior to launch you can get it here, and post launch it will be available in the App Store.
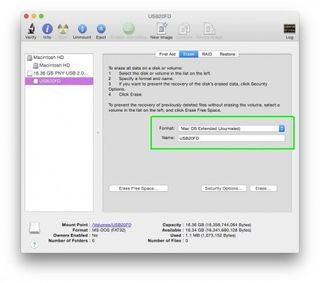
2. Reformat your USB drive using Disk Utility. Choose format “Mac OS Extended (Journaled)” and name it “Yosemite” and then click “Erase.”
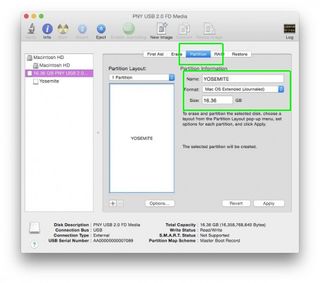
3. Select the drive and switch to the Partition tab. Choose “1 Partition” and make the format “Mac OS Extended (Journaled).”
MORE: How to Find Downloaded Files in Mac OS X
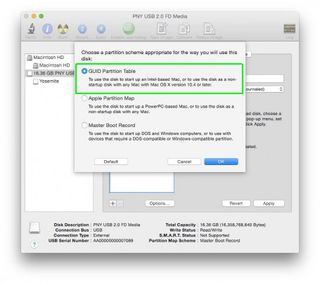
4. Click on the “Options” button and Choose “GUID Partition Table.” Click OK and then Apply. This will make the USB drive bootable.
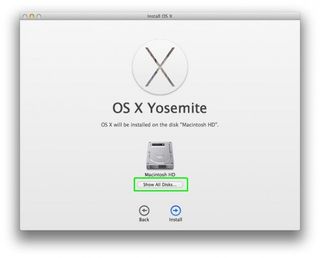
5. Start the install of Yosemite and agree to the user agreement. Then click “Show All Disks...”.
Stay in the know with Laptop Mag
Get our in-depth reviews, helpful tips, great deals, and the biggest news stories delivered to your inbox.
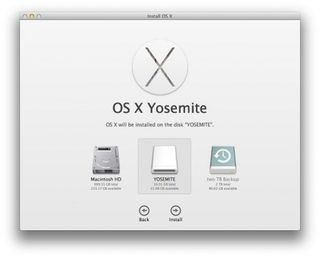
6. Select your thumb drive and click “Install.” You will be prompted for your admin password. Your computer will reboot, and Yosemite will then install on your thumb drive. Once it's installed, you can choose to boot to that disk by holding down the Option key as your computer restarts.
OS X Yosemite Tips
- How to Upgrade to Mac OS X Yosemite
- How to Back Up Your Mac With Time Machine
- How to Clean Out Your Launchpad
- How to Use the Dark Mode in Yosemite
- How to Copy Files Between Mac and iPhone with AirDrop
- How to Customize the Dashboard in Mac OS X Yosemite
- How to Customize the Notification Center
- How to Mark Up PDFs in the Mail App
- How to Install Mac OS X Yosemite on Parallels
- How to Use the New Spotlight Search in Yosemite
