Fix Your Laptop: 34 Tips, Apps, and Gear

While notebook makers continue to churn out new models every month, consumers are holding on to their aging notebooks for longer than ever. People keep their laptops for an average of four years and four months; a month longer than they did a year ago, according to a recent report in The New York Times. The problem is that laptops don’t age gracefully. At all. After a while, your machine can slow to a crawl, run out of power faster than you can say “where’s my charger?” and collect crumbs like a sofa. To help reverse the aging process, we rounded up PC owners’ most common complaints, along with advice for making your notebook perform like it’s fresh from the box—or better.
Speed Up Your Boot Time
Remove unnecessary startup programs.
Your PC might be programmed to launch certain apps as soon as your notebook boots. But chances are you don’t need to use them all immediately. To whittle down this list of programs, Windows XP users can select “Run” in the Start menu and type “msconfig.” A box will appear with a tab for startup programs; uncheck the unnecessary ones, such as Adobe Reader, Google Talk, and Skype. Then follow a prompt to restart your PC. If you have a Vista or Windows 7 machine, you can access this menu simply by typing “msconfig” into the search bar below the Startmenu.

Identify problem programs.
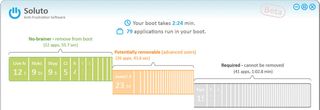
Sometimes it can be difficult to figure out which programs are actually bogging down your computer. Enter Soluto (www.soluto.com), a free, Windows-only program that automatically perks up when it senses your PC is overwhelmed. Soluto identifies which programs are causing your computer’s sluggish performance, dividing the possible perpetrators into no-brainers, potentially removable startup items that only a power user should consider nixing, and those that Soluto can’t yet remove, such as McAfee SecurityCenter. It even shows how much time each app adds to the total boot-up process, which it calculates when you launch your PC.
Make certain programs launch later.
Stay in the know with Laptop Mag
Get our in-depth reviews, helpful tips, great deals, and the biggest news stories delivered to your inbox.
Maybe you really do need to use some programs as soon as your computer is up and running. But you can at least make sure that Windows finishes loading first. Soluto, in particular, does this beautifully. The app gives you the option of delaying programs, and also shows neat pie charts breaking down what other Soluto users did with these programs. Soluto also briefly explains the implications of delaying each startup program, such as Google Helper, which updates Google applications, or Windows Media Player’s sharing feature. Another option is to download a third-party program such as Startup Delayer (free; r2.com.au), a small 979.9KB app that works with every Windows OS.
Make tweaks to your BIOS.
Right after you press the power button on your Windows PC, press F2 or another designated function key to enter the BIOS menu. Here, you’ll see an option to boot faster or, perhaps, skip tests. You can also stop your PC from trying to detect CD and USB drives, which should speed up the boot process. Make sure that you don’t have any drives plugged in while you do this.
Improve Performance
Add RAM.

Installing extra RAM, or memory, in your PC is an inexpensive, tried-and-true way of boosting its performance. Retailers such as Best Buy and NewEgg.com sell 2GB memory sticks for about $25, with 4GB kits costing about $50.
First, figure out how much memory your PC can handle. If you own a PC running Windows 2000 or XP, you can install up to 4GB. People who own notebooks running Windows Vista and Windows 7 should check the system information in the Control Panel to see if the operating system is a 32-bit or 64-bit one. 32-bit operating systems can accommodate up to 4GB of memory; 64-bit systems, up to 8GB. After you’ve purchased the RAM, you’ll need to open the back of your system to install. The exact location of the RAM can vary, so check your notebook manufacturer’s support site for directions.
Apple MacBooks can accept up to 2GB or 4GB depending on the model; MacBook Pros can handle up to 8GB. There are detailed instructions on how to do this to various models at support.apple.com.
Scrub your registry.
Install a registry cleaner such as Piriform CCleaner (free; www.piriform.com) to remove extraneous files clogging your system. In addition to old, unused registry entries, CCleaner will clear temporary system files, web form data, recent documents, cookies, your browsing history, and items in the Recycle Bin.
Try a tune-up suite.
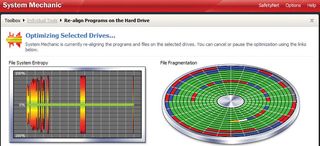
For a more complete cleansing, tune-up software will clean your registry and use other tricks to breathe new life into your notebook. For PC owners, we recommend Iolo System Mechanic 10 ($49.95; www.iolo.com), which turns off unused background programs, identifies redundant and rarely used programs, and optimizes network settings.
Mac owners have their choice of tune-up apps, too, including the reasonably priced Cocktail ($14.95; www.maintain.se/cocktail). Remember that many PC security suites include some tune-up utilities. So before you spring for a dedicated tune-up program, see if your antivirus software can get the job done.
Defrag the hard drive.
Defragging, short for defragmenting, is a PC’s way of organizing its files more efficiently. Over years of use, pieces of a file might become scattered across different parts of a hard disk, forcing the computer to spend more time searching for them. To defrag your hard drive, go to the Start menu > System Tools > Disk Defragmenter. Mac users can use the built-in Disk Utility, located under the Utilities menu.
Install a solid state drive.
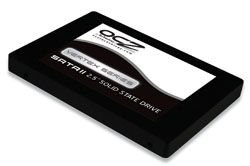
SSDs are flash-based drives that deliver much faster startup times and better overall performance than a traditional hard drive. And since they don’t contain any moving parts, they’re more durable, too. Luckily, prices have fallen sharply, making them better suited for do-it-yourself PC makeovers. We recommend the OCZ Vertex 2 series (from $114 on NewEgg) or the Samsung 470 series (from $149 on NewEgg). For instructions on how to upgrade to an SSD, see our how-to on page 95.
Maximize Battery Life
Buy a replacement battery.
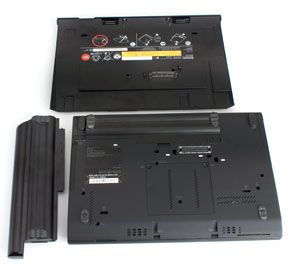
Laptop manufacturers sell them. Retailers such as Best Buy do, too, but only for select models of major brands such as Dell and HP. You can also check out online battery stores such as www.laptopbatteryexpress.com and www.laptopbatterystore.com for a more extensive array of Macs and PCs. Prices vary depending on the PC, the battery’s voltage, and the retailer. Laptop Battery Store, for instance, sells replacements for $45 to $73, while Best Buy’s cost between $79 and $119, though its selection is more limited.
Many notebook manufacturers also sell extended batteries, which have nine- or even 12-cell capacity, providing a boost over a standard six-cell or older three-cell battery. In our recent review of the Lenovo ThinkPad X220 (p. 30), a nine-cell battery added about 5 hours of battery life, while a 12-cell battery added roughly 12.5 hours. Sometime, companies also sell so-called battery slices, which you can snap in alongside a battery. In the case of the X220, this added another 5 hours.
Tweak the settings.
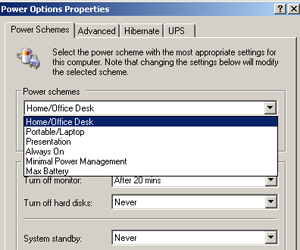
Both PC and Mac owners will find a preset power management setting designed to conserve battery life. Under this setting, the computer will go to sleep sooner and the display won’t be as bright. You can also manually lower your screen’s brightness. PC users can click the battery icon in the system tray and then select “Power Saver.” If you own a Mac, click the battery icon in the upper left-hand corner of the screen. Then click “Energy Saver Preferences.” When the energy settings menu appears, type either “conserve power” or “conserve battery” into the search bar in the upper left corner of the box. This will make your Mac more energy-efficient, putting the hard disk to sleep when possible and reducing the screen’s brightness before putting the display to sleep.
Let your PC improve itself.
Windows users can have the PC diagnose energy inefficiencies on its own, and then adjust the settings accordingly. In Windows 7, go to Control Panel > Troubleshooting > Systems and Security > Improve Power Usage. Then click through the on-screen dialog box.
Free Up Hard Drive Space
Back it up.

If you want to back up a lot of data at once, our favorite external hard drive is the Iomega eGo SuperSpeed USB 3.0 (starting at $109; www.iomega.com). The drive is backwards compatible with the USB 2.0 ports you’ll find on an older notebook. When you finally upgrade, your USB 3.0 drive will work with many brand-new models. Conveniently, the drive comes with Iomega’s QuikProtect suite, which includes software that creates a copy of the operating system, as well as your programs and settings. The drive also includes 2GB of free storage space with the backup service MozyHome (more on that in the next section).
Identify rarely used programs.
You might have software installed that you never, or seldom, use. Comb your list of applications and consider deleting ones you rarely open, or at least storing them on an external hard drive. Go to Control Panel > Programs and Features, right-click on the header bar, and click “Used.” You can also go to My Computer, right-click on the primary drive (typically “C”), highlight programs you don’t use and click “Uninstall.”
Cut the crap.
You probably won’t miss most of the programs that come pre-installed on your PC, known not-so-affectionately as “bloatware.” Keep an eye out for simple games, browser plug-ins and apps such as Google Desktop. Sometimes, bloatware includes software developed by laptop manufacturers. These run the gamut from network managers to power management utilities. Another culprit: photo organization software you might have installed along with your all-in-one printer. On the flip side, remember not to delete your security software.
Send your files to the cloud.
The online service Dropbox is best for syncing files between your PC and the web, or perhaps even another computer. But it’s not ideal for a backup where you are moving the files off of your hard drive. For that, there are services that will let you store documents and media files such as music and photos.
MozyHome (www.mozy.com), our reigning Editors’ Choice winner, is owned by storage giant EMC, which means the chances of the service folding abruptly are slim. Mozy offers 2GB for free, 50GB for $5.99 per month for one PC, and 125GB for $9.99 a month for three PCs. It’s Mac- and PC-compatible and conveniently backs up your files while your computer is idle. Be warned, though, that the service only saves versions of files for 30 days.

SOS Online Backup (www.sosonlinebackup.com) does store an unlimited number of file versions, though at $9.95 per month for 50GB, it’s more expensive. SOS is also compatible with PCs, iPads, and iPhones, but not with Mac computers.
Carbonite (www.carbonite.com), another popular service, offers unlimited backup for $54.95 per year, a boon for people who don’t want to keep tabs on their usage. Its Mac- and PC-friendly software is particularly easy for novices to use, though power users will find cherry-picking select files for backup to be a more painstaking process.

In each of these cases, you can schedule backups, and the software will be smart enough to only save changes to files you have already saved. That’s less time-consuming than saving each whole file over again.
Recover From and Prevent Crashes
Install security software.
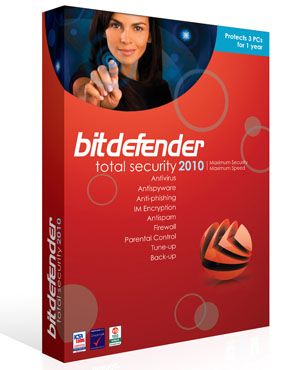
Oftentimes a notebook will become unstable because it has become infected with a virus or other malware, so you need to shield your machine from potential damage. BitDefender Total Security 2011 ($79.95;www.bitdefender.com) combines anti-malware protection with PC tune-up tools—not to mention online backup and parental controls. This lightweight suite also has an intuitive, customizable interface. For Macs, we suggest Intego Internet Security Barrier X6 ($79.95; www.intego.com). Want malware protection on the cheap? Try Ad-Aware Free Internet Security (www.lavasoft.com).
Make sure your drivers are up to date.
Download the latest drivers for your video card, wireless radio, and other components. You can find these drivers on your PC maker’s support website. Usually, there’s a section called “drivers and downloads,” or something to that effect, where you can find drivers by specifying what laptop model you own. The drivers are usually broken down by category (e.g., audio), though you can choose to see all available downloads. Click “Download” and follow any on-screen instructions, just as you would if you were downloading a piece of software. Restart the computer as soon as you’re done to ensure that these drivers take effect.
Download any updates for your operating system.
You’ll also want to update other software that you use most frequently, such as iTunes, browsers, and photo editors. With each update, software should become more stable. To do this, go to Control Panel > Windows Update > Check For Updates. Then click “Install Updates” when your PC is done searching.
Reinstall the operating system.
Note that we only recommend this step if all else fails. To start, insert the disc containing your Mac or Windows operating system and factory settings. This disc should have come with your PC or Mac. Then, follow the on-screen directions. Before you do this, though, make sure that you back up all your programs and files to either an external hard drive or an online backup service. The length of the backup will depend on how many gigabytes you are backing up and how much time has passed since your last backup.
Clean Your Laptop
Make the screen sparkle.

Use Speck CrispView Screen Cleaner ($9.95; www.speckproducts.com), which comes with a cloth, to clean the screen. Distilled water will work, as will a 50-50 mix of distilled water and white vinegar. Use cheesecloth to wipe the cleaning fluid away.
Get rid of crumbs.
Use compressed air to blow dust and bits of food out of your keyboard. We suggest Fellowes Air Duster ($12.48 for a 10-ounce can on www.amazon.com). Apply Speck’s cleaning solution to cotton swabs and—making sure they’re not too wet—clean the sides of the keys. Then use a moistened cloth or Q-tips to clean the tops of the keys and the deck.
Replace missing keys.
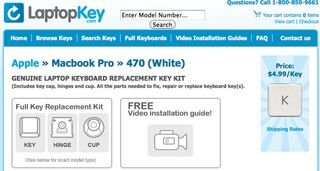
Missing individual keys, such as the backspace button? You can buy keys for specific models of laptops through sites such as www.laptopkey.com and www.laptop-keys.com. Both sites charge $5 for each key, matching a wide array of laptops. But the latter also provides instructional how-to videos. Beware: Replacing keys involves sticking a small rubber piece between the key and keyboard panel to restore bounciness as well as using a small clip to attach the key to the base.
Empty the vent.
If it’s easily accessible, you could try unscrewing the vent on the side of your laptop to remove dust and animal hair. Since this requires mucking around with the interior of the laptop, we recommend it to seasoned tinkerers only.
Fill in the (screen) blanks.

As a computer ages, the pixels in the display die naturally, leaving tiny black dots. Remove—or at least reduce—these blemishes using JScreen, a free utility (www.jscreenfix.com). Since the tool is browser-based, you can use it to clean a Mac or PC screen. Just click to launch the applet and position the small browser window that appears over the blemish on your screen. The window will flash a maze of colors whose fuzzy pattern is reminiscent of the static on analog televisions. After 20 minutes, move the window to see if the black dots on your display are filled with color. If not, the pixels are likely dead, not stuck. And without replacing the screen, you’re out of luck.
Boost Your Internet Speed
Update your web browser.
When it comes to loading websites, not all browsers are created equal. In a recent face-off, Microsoft Internet Explorer 9 trounced Firefox 4 and Google Chrome in a speed test. Unfortunately, though, IE9 is only compatible with Windows Vista and 7. XP users are better off with Chrome, which launches faster.

Upgrade to a 802.11n router.
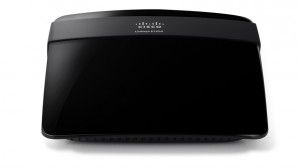
We like the Cisco Linksys E1200 Wireless-N Router ($49.99), which is easy to set up, offers solid performance, and range, and even comes with parental controls. Just remember that your notebook must have an 802.11n card for you to experience the speed and longer range of 802.11n.
Buy a new wireless adapter.
While most newer notebooks come with 802.11n Wi-Fi cards, cheaper laptops and those that have been around for a few years will typically house an 802.11g card, which is slower. So try upgrading to a device such as the Cisco-Linksys WUSB600N Dual-Band Wireless-N USB Network Adapter ($49.95) to upgrade your laptop to wireless-N.
