If you want to run an Android emulator in Windows, you have a few choices. You can configure the incredibly slow and difficult-to-use Android SDK. Or you could try the BlueStacks emulator, which is incompatible with many important apps and doesn't provide an Android interface. But your best bet is create your own Android emulator that runs in a Window.
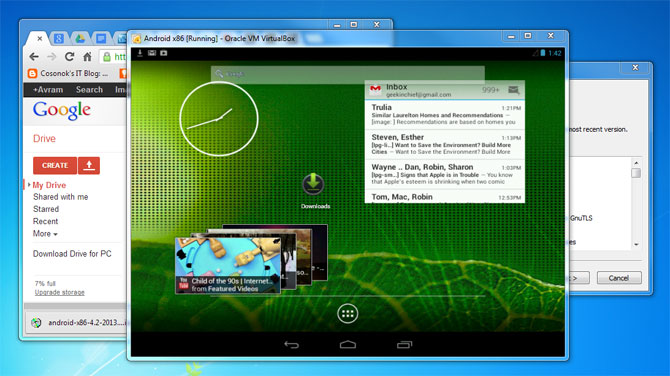
By creating a virtual machine that runs Android x86, a version of Google's OS for computers with Intel/AMD processors, you can have the full Android experience in a window, complete with a desktop, navigation buttons and access to the Google Play store.
- Is the Microsoft Surface Go 2 still worth buying in 2021?
- How to check Windows 11 compatibility using Microsoft’s Health Check app
- Surface Pro vs. Surface Laptop: What Should You Buy?
To create your own Android emulator that runs under Windows:
1. Download and install VirtualBox.
2. Download the latest version of Android x86 from android-x86.org. You will need the live and installation iso. As of publish date, the latest available version was android-x86-4.2-20130228.iso.
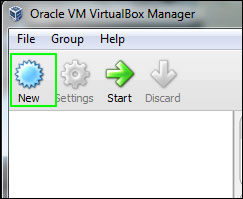
3. Launch VirtualBox.
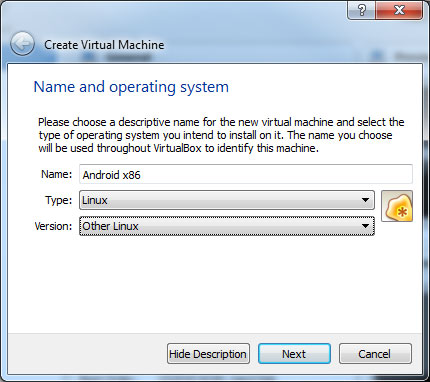
4. Click New. A dialog box appears with fields for the name and type of operating system.
5. Enter "Android x86" for name then select Linux and Other Linux under Type and Version and click Next.
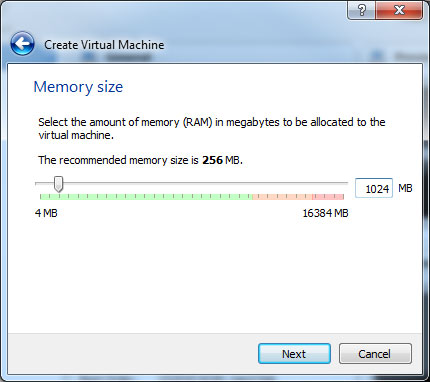
6. Select at least 1024MB of RAM and click Next when prompted for memory size. If you have 8GB of RAM or more in your computer, select 2048MB for the virtual machine.
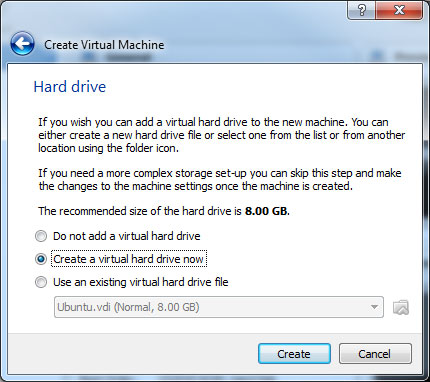
7. Select Create a virtual hard drive and click Create when prompted to choose a drive.
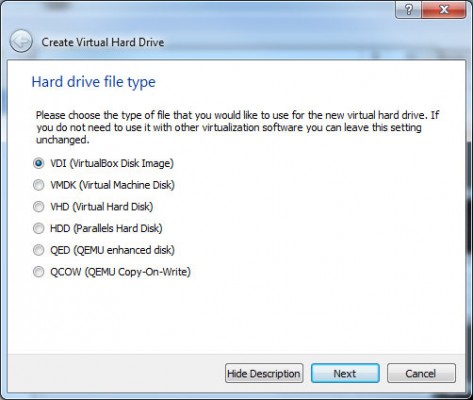
8. Select VDI then click Next when prompted to choose a hard drive type.
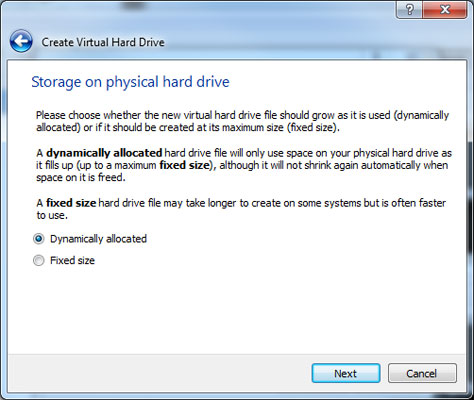
9. Select Dynamically allocated or Fixed Size then click Next when asked what type of drive you want to use. A fixed size virtual hard drive will be a little faster, but will immediately eat up a certain amount of storage space on your real-life storage drive. A dynamically allocated drive file will only use as much space as it needs and grow up to the amount you set. So, if you have a dynamically allocated 8GB drive but only use 2GB, the file will only take up 2GB of your hard drive.
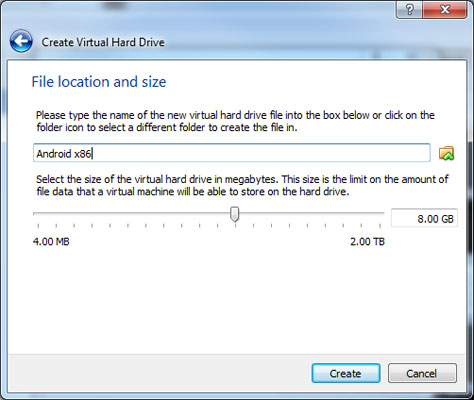
10. Select 8GB and click Create when prompted for storage size. You can choose a greater drive size if you plan to install a ton of apps, but otherwise, 8GB should be more than enough for your emulator. An icon for Android x86 appears in VirutalBox's left window pane.
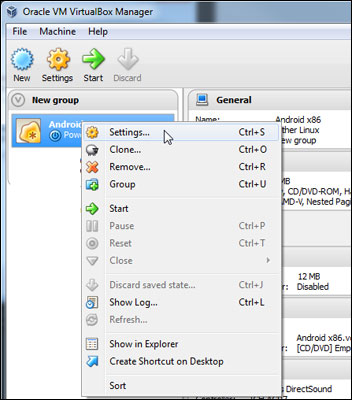
11. Right click Android x86 and select Settings.
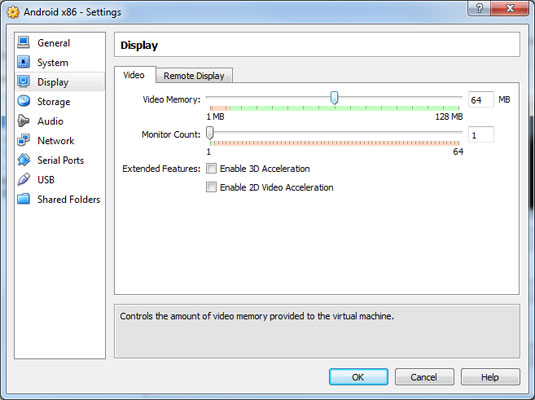
12. Set the video memory to at least 64MB under the Display submenu.
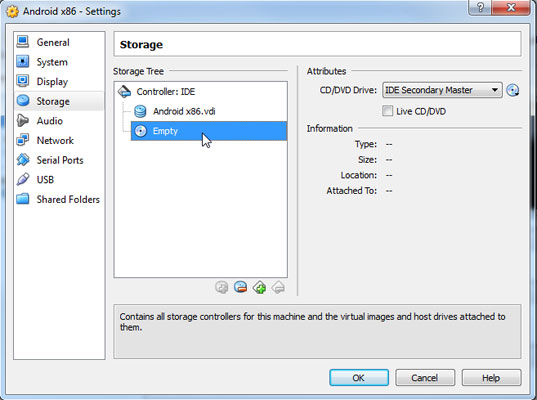
13. Select the Optical drive under the storage submenu.
14. Click the optical drive icon under attributes and select Choose a CD/DVD disk file.
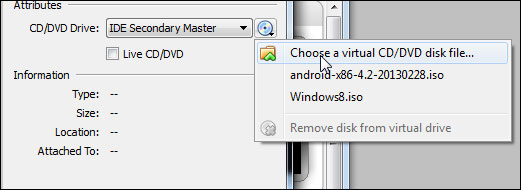
15. Select the Android x86 ISO file you downloaded earlier then Click Ok.
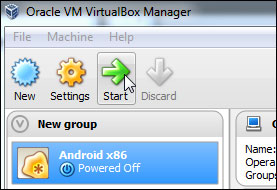
16. Click Start with Android x86 selected. The virtual box will boot off the ISO file and present an install menu.
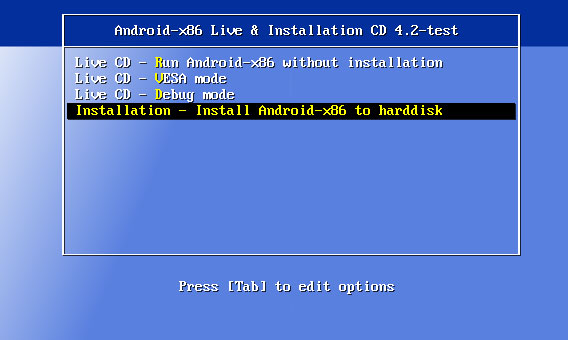
17. Select Installation from the menu.
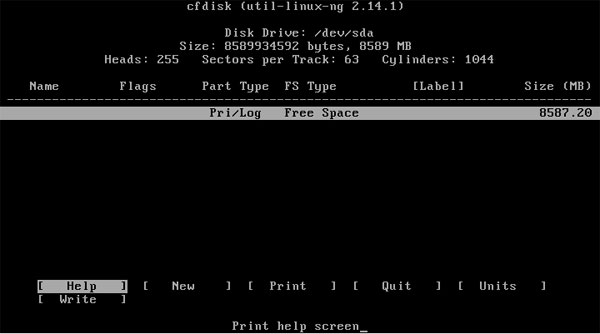
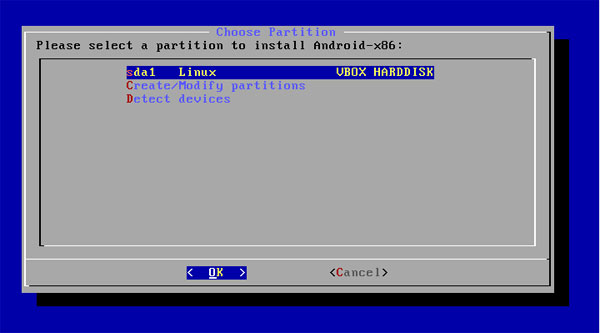
18. Select Create/Modify Partitions and Click Ok. A partition menu appears.

19. Select New then Primary to create a single, primary partition on your virtual hard drive. Click Enter to configure the partition to use all available space on the virtual hard drive.
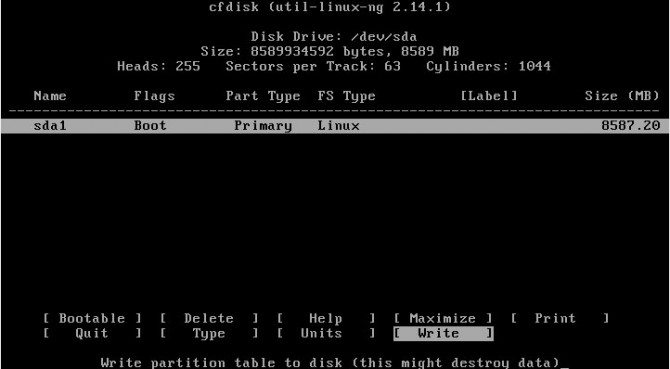
20. Select Bootable then Write and type "yes" to confirm. Then select Quit to return to the installation program.
21. Click Ok to install onto the partition you just created.
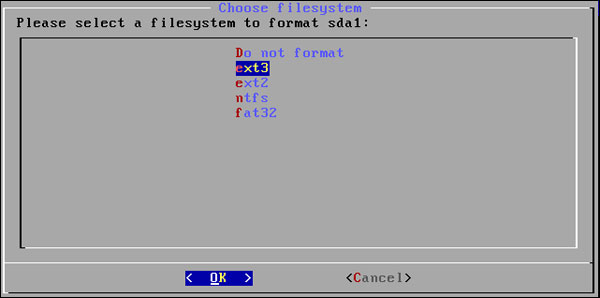
22. Choose ext3 when prompted for a fileystem format. Click Yes to confirm. The system will now copy some files.
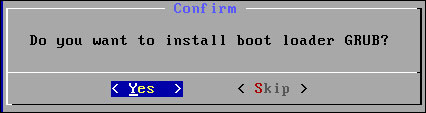
23. Click Yes when asked if you want to install GRUB.
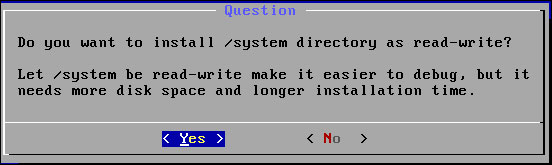
24. Click Yes when asked if you want to install /system as read-write. This will allow you to make some hacks if you choose to in the future. The system will now copy a few files.
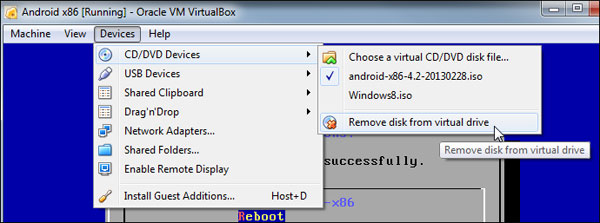
25. Select Devices -> CD/DVD Devices -> Remove disk from virtual drive from VirtualBox's top menu bar then click Force Unmount from the dialog box.
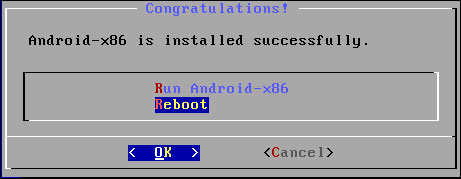
26. Select Reboot and click Ok. The system will boot into Android and after offering you the chance to boot to Debug or regular mode.
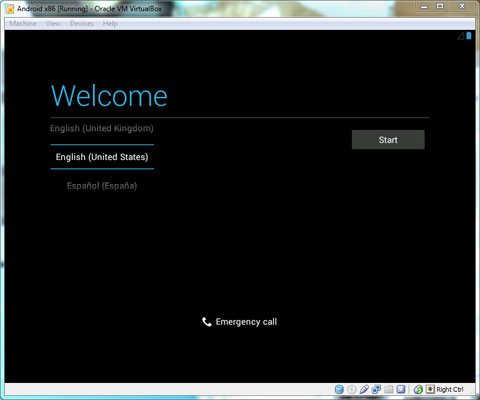
27. Step your way through Android setup as you would on any phone or tablet, entering your Google account info and changing any settings you like. Don't configure Wi-Fi because VirtualBox already gets its Internet connection from your PC. After hitting the "Start button" on the welcome screen, there may be a minute or two delay.
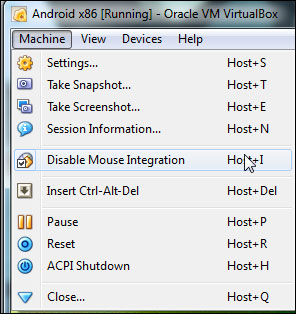
28. Select Disable Mouse Integration from the VirtualBox Machine menu to make sure your mouse pointer stays synced with your movements. Use the right CTRL key to move your mouse pointer out of the VirtualBox window. Hitting Right CTRL + C will allow you to scale the Android window as you resize it.
Waking the Android Emulator from sleep
While Android x86 provides a true Android experience on your PC, it has a few quirks of its own. Perhaps the most obvious of these is that you can't wake it from sleep, simply by clicking on the emulator window. If the screen goes to sleep, you must hit the menu key on your keyboard, which is usually between the right Windows key and CTRL key on your keyboard, to wake it.
Change the Android Emulator's Screen resolution
By default, the emulator window is set to 800 x 600 resolution. To boot into a higher resolution:
- Hit the "a" key when the GRUB menu appears at boot time.
- Type "vga=ask" at the end of the command that appears and hit Enter.
- Hit Enter again to see a list of video modes.
- Input the number of the mode you want (ex: 1152x864x24 is number 34B) and hit Enter.
In our experience, many of these video modes did not work and required us to reboot. However, you can feel free to experiment.

